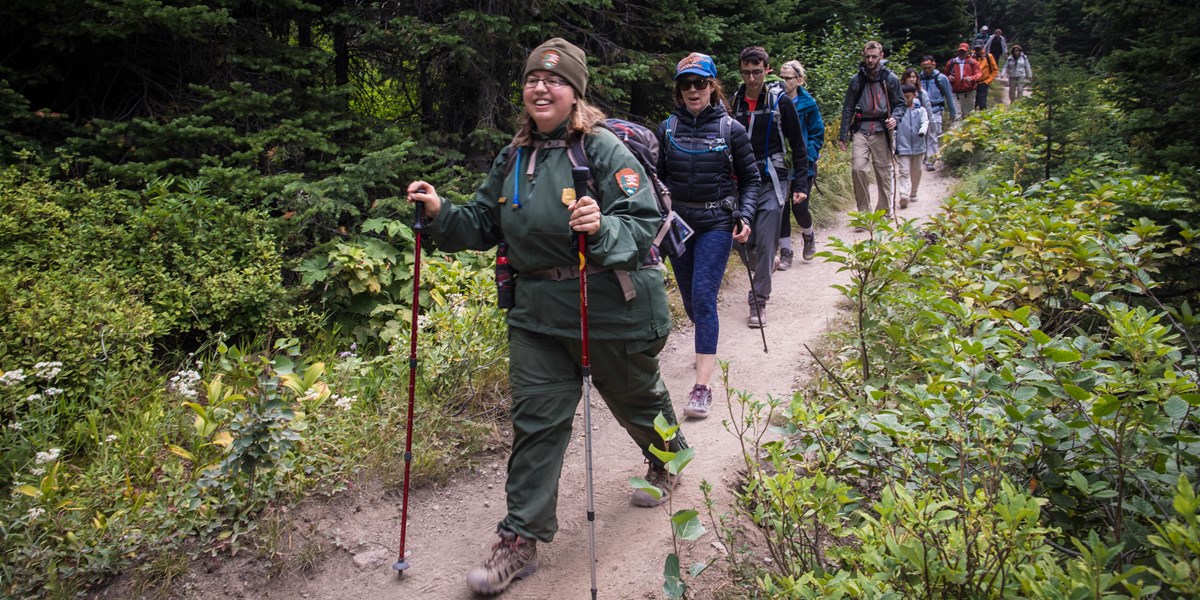
The Maroon Bells Snomass Wilderness is a great place to hike in Aspen, Colorado. This little parcel of alpine terrain lies only 10 miles from Aspen. Most trails are straightforward, some starting at 8,300 ft. and rapidly ascending. This area offers many hiking opportunities, and it is accessible year-round.
Maroon Bells hikes demand solid footwear due to their elevation. Winter months are colder than summer, so the road closes in mid-November and reopens in mid-May. You can still take snowmobile tours in the nearby mountain ranges if you are visiting the area during the winter months. Drive 6 miles to get to Maroon Lake trailhead. If you have children, consider hiring a babysitter or hiking a trail in wintertime.
The Scenic Loop Trail is the most popular hike in Maroon Bells, with a scenic backdrop of mountains and wildflowers. The trail is shaped like a lollipops and begins with a straightaway that ends in a loop. You will begin your journey at the west side of the lake. Cross another footbridge and continue the loop. Continue hiking around the lake's perimeter and then return to your parking spot.
Three campgrounds are available in the region, one of which is right next to the Maroon Lake trail. The second one, located 3.7 miles away from the trailhead, is easier to access. The trail is scenic, but it can sometimes be difficult to spot the maroonbells from afar. You might even see moose. The hikes in Maroon Bells, despite its beauty, are very popular with tourists. While the Forest Service is working to manage its popularity well, it is important not to forget that camping is still forbidden at higher elevations.
Maroon Bells Trail is one of the most popular. This 1.8-mile trail offers a great view of the Maroon Bells, and is relatively flat. It's popular among backpackers and other hikers and suitable for all levels of physical ability. While it's not as difficult as the other, it is not wheelchair-accessible. It isn't necessarily the best trail in the region but it is one of its most popular.

You can also choose from other trails, in addition to the popular Maroon Bells hikes. The Scenic Loop Trail has a stunning three-mile stretch of lollipop trail. The scenic loop trail offers the most straightforward and fastest route. We recommend that you start your trip by driving to the area. There are a few other trails in the area, including Crater Lake.
You should adjust to high altitude when hiking in Maroon Bells. Arriving at the Welcome Station before sunrise is a great idea. This way, you'll have plenty of time to acclimate to the elevation before you start your hike. Once you feel at ease at higher elevations, you'll be able enjoy the magnificent views. Maroon Bells also offers many other hiking opportunities.
FAQ
How do I start prepping for survival?
Start with an essential kit. A basic kit for food, water, shelter, and medical supplies. You can then add items to help you stay secure and safe.
Also, consider adding a flashlight, compass and whistle to your solar-powered radio. You might also consider fishing equipment if your home is near rivers, lakes, and streams.
A bug-out bag (BOO), is another way to be prepared for any emergency. This is a backpack filled with essential gear. Some BOOs can include a tent and sleeping bags, stove, firestarter or stove, as well as utensils, batteries.
There are many options to prepare for disasters. These are the basics. Expand your list according to your situation.
Where should I keep my survival gear in?
It's best to keep your survival gear close at hand, so it's easily accessible in case of an emergency. You can store your supplies in a closet, under your bed, or in the basement.
Label your supplies with their contents and dates so that you can identify which ones have been used and which ones are still good.
Keep a copy of the inventory in another place. In case of an accident to your home or apartment, you will need proof that you have the right stuff.
What do you need to have on hand for the end-of-the world?
You may think it's silly but you need to know what you need to buy if you want survive the apocalypse.
Here is a list to help you keep your home safe when the world goes dark.
Mental and physical preparation is the best way you can be ready for an apocalyptic emergency.
You should be prepared for all eventualities.
Start by creating a stockpile of food and water.
You should also consider other essentials such a fire starter, torch, batteries, candles and matches, first aid supplies, emergency equipment, medical supplies and medication.
Make sure you have enough money to last until the end.
Who knows how many years we'll live?
How do I doomsday planning on a budget
It can be hard to prepare your home for the apocalypse. There are three things you can do to make sure that you are prepared for the apocalypse.
-
It is important to ensure that you have enough water as well as food. It is not a good idea to be without food and water in case of disaster.
-
A solar-powered radio is a great option. This device will keep your informed about the latest happenings around the globe in case of power failures.
-
Learn how to grow food yourself. This will allow you to know exactly what foods you should eat. Plus, you won't have to worry about running out of supplies.
What should you have in a bug-out bag?
A Bug Out Bag (BOB) is a kit designed to help you survive 72 hours without food, water, shelter, or communication. It includes a flashlight with a whistle, compass and knife, a whistle, a fire starter, compass, knife and matches.
You will likely only use half of the items you choose to place in your BOB. Make wise choices.
What should I keep in my home for an emergency?
If you are planning on going away for an extended period of time, it is important to think ahead and prepare yourself for any eventuality. You might want to consider packing a few essential items such as food, water, a first aid kit, a torch, batteries, etc. This will help you feel more prepared and confident that you will survive whatever situation arises.
The best place to start is with a basic emergency kit. Ensure you include bandages, antiseptic cream, painkillers, gauze pads, scissors, tweezers, thermometers, disinfectant wipes, and alcohol swabs. A small flashlight is also a good idea to help you see what's in your kit when there's no power.
This container can be used to store the items in. It will help to keep the items dry and clean.
Another option is to keep food frozen for up two weeks. You could even create your own freeze dried foods. These foods are very easy to make and do not require any cooking tools. Add hot water to make it ready to eat.
A solar-powered backup battery system would also be a great idea. This will allow you to charge your mobile phone, tablet, and laptop.
Statistics
- A gravel bike was the clear winner, receiving more than 90 percent of the votes. Background: This summer, we surveyed our readers about what they’d shove into a backpack if they were caught unprepared for the collapse of society. (inverse.com)
- Some 57.2 percent of voters chose Crocs, proving that comfort rules. Background: This summer, we surveyed our readers about what they’d shove into a backpack if they were caught unprepared for the collapse of society. (inverse.com)
- Approximately a hundred and seventeen million people earn, on average, the same income they did in 1980, while the typical income for the top one percent has nearly tripled. (newyorker.com)
External Links
How To
How to find potable water in a survival situation
If you're in a life-threatening situation, it can be life-saving to find water. It is essential to learn how to find potable drinking water quickly and efficiently when you're in survival situations. You need enough water to sustain you until help arrives. If you don't have access to clean drinking water, you could get sick and die from dehydration.
This article will cover some tips on finding safe water during emergencies. We'll cover what types of water sources there are and which ones are best suited for different situations. We'll show you how to filter the water and make it safe to drink. The last thing we will discuss is how to store water.
What Are the Types of Water Sources Available?
While you're in the wild you will find many water sources. Depending on where you live, these water sources might be available year-round, or they might only be accessible seasonally. There are many factors to consider when choosing the right water source for you.
The first thing you need to do is determine whether you will have access to fresh water. This means that you should consider whether you will have easy water access to streams, rivers or springs. The second is whether you have access water. Avoid collecting water contaminated with urine or feces as you will not be able to properly treat it before drinking it. The third thing you need to consider is how much water you will need. You will need to consider how long you are going to be out of your home, how dry and hot it is, what size your family is, and how many people you have. Fourth, how do you transport the water? You might not be able to access some water sources, which can make transportation more difficult. A heavy container filled with water might be necessary to transport it uphill. It is also important to consider weather conditions when selecting water sources. You might not want to rely on rainwater during a storm, but if it is sunny you might be able to collect water without worrying about contaminating it.